Some basics to use Hydra through web interface.
If you have Hydra already up and running then you need to add some work to it.
You start on Hydra by creating a project, then you need a jobset, after that you include build inputs to it and Hydra will automatically start evaluation.
You confused now? Long version is here:
Project
Project is actually a group of Jobsets, and you can create it by clicking on Admin -> Create project, here you specify meta data and assign the owner of the project, the one who can configure jobsets within this project.
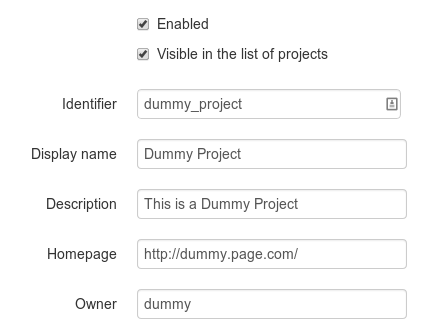
Jobset
Jobset contains build configuration (build inputs) and meta data. Create it by clicking Actions -> Create jobset, located on project page.
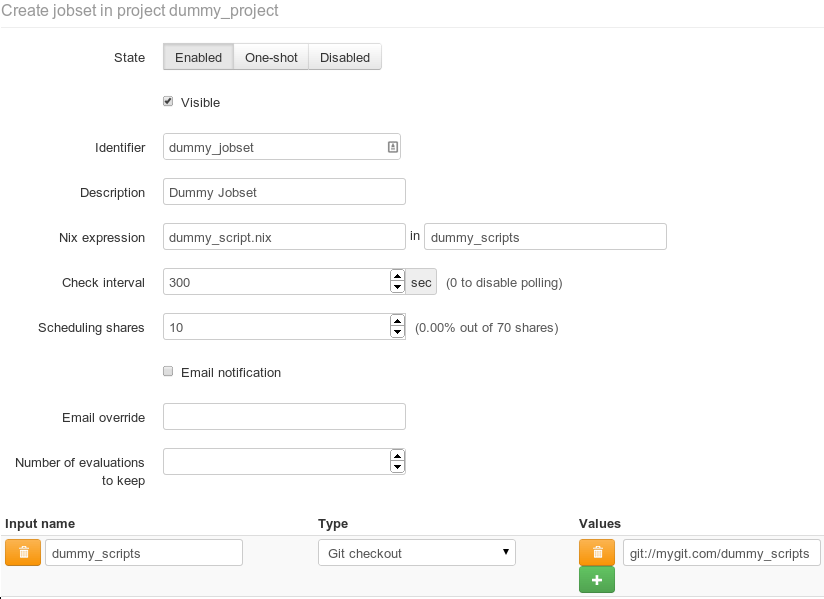
I think that some options are self-explanatory, the rest are here
| Name | Description |
|---|---|
| State - Enabled | Hydra will check all build inputs periodically and start evaluation when it detects the change |
| State - One-shot | evaluations will not be automatically started you must start them by hand (located in jobset page: Actions -> Evaluate this jobset) |
| State - Disabled | disabled state, but you can start evaluation by hand (not sure if this is a bug). |
| Nix expression | this loads dummy_script.nix from build input named in this example: dummy_scripts |
| Scheduling shares | larger the number the faster evaluation of this jobset will start, considering you have more jobsets, with only one jobset this option has no effect |
| Build inputs | here we have one input named dummy_scripts which in this case is Git repository that includes file named dummy_script.nix, the rest of build inputs are available as parameters of this script |
Job
Job is produced by Hydra, one jobset can contain multiple jobs (hence the name), they are created by scripts written in Nix expression language.
Now comes the example
This Nix expression script is useful when you wish to test some package(s) if their build process is successful and when you wish to share binaries with others.
Now make a new jobset, with this parameters…
| Name | Value |
|---|---|
| State | Enabled |
| Visible | checked |
| Identifier | build_shells |
| Description | With this jobset we build shells. |
| Nix expression | build-general.nix in hydra_scripts |
| Check interval | 30 |
| Scheduling shares | 10 |
and build inputs …
| Name | Type | Value |
|---|---|---|
| hydra_scripts | Git checkout | git://gist.github.com/7328623.git |
| attrs | Nix expression | [ “bash” “zsh” ] |
| supportedSystems | Nix expression | [ “x86_64-linux” “i686-linux” ] |
| nixpkgs | Git checkout | git://github.com/matejc/nixpkgs.git |
For nixpkgs build input you can use your own forked official NixOS/nixpkgs, I do not recommend using official repository for this because it is busy, and remember.. when I wrote that Hydra checks every build input for changes and then starts evaluating every jobset that has changed, well, in this case it will rebuild only if someone changes bash or zsh packages.
Now wait for the evaluation to pass, meanwhile take a look around the page.
When a build is successful you will see something like this
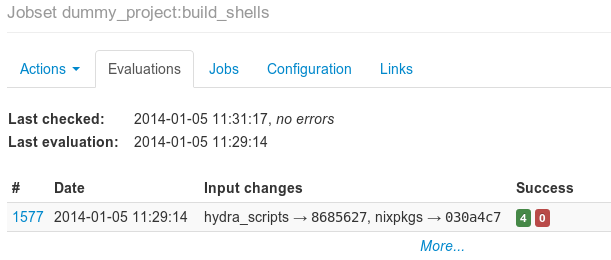
go to the Jobs tab and you should see something like this
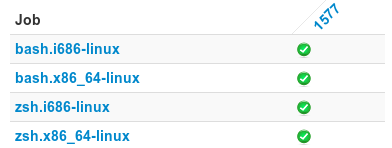
click one Job, I choose ‘bash.i686-linux’, now click on the number preceding release name of the package to get to this page
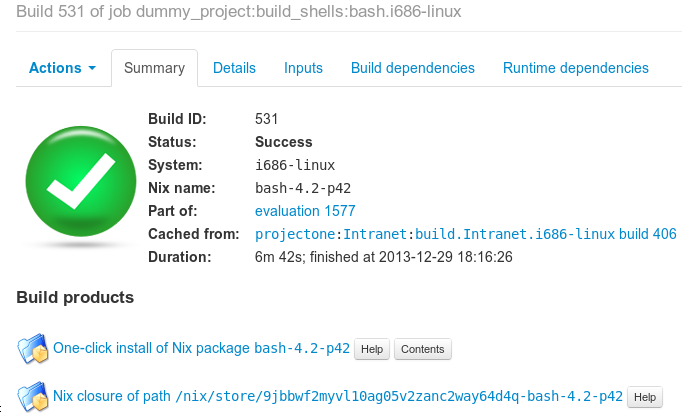
On Summary tab the most interesting thing are Build products, where you can click on the Help button beside them and install that package on your computer.
This example is not very useful because bash and zsh are already available in NixOS cache, but with this script you can build any package in nixpkgs repository, including your own packages, even before you make an official pull request to the NixOS/nixpkgs repository and do not forget the Build products… with one command you can install that package on any computer that has Nix package manager installed.


