The whole story about making the shower cabin drain filter/strainer.
Problem
I have recently moved to the new apartment, and after few weeks of showering the drain was already clogging somehow, so I removed the drain cover and saw a filthy filter, in fact, I was expecting worse. Since the filter was filled with water and there where gaps around it - between the walls of the opening and the filter itself - I removed the filter, and it revealed dirty water that was standing in the hole. The water in the hole is ok, because the drain has a similar system as toilets have - standing water prevents dirty odder from sewage below. But here was a real problem, after I put some water into and it just stood there. Well.. in fast it was very very slowly draining the water away, it had to be five minutes for a liter of water to disappear. I went to a store to buy an unclogging solution which usually comes in one litter bottles if buying in liquid form. After pouring slowly half of that toxic solution, I waited for a 10-20 minutes, then went to boil 2-3 litters of water and pour all of it in the drain. Problem was gone, so I put the cleaned filter in and a cover. Problem was back in a few weeks again. It was clear to me that filter is not doing its job, the gaps are too big and it does not fit in the drain hole.
Solution
Drain filter would be tough to replace, because shower cabin was obviously custom made, and even if it was not, filter would be the same as the current one. There is a but! But since I have a 3D printer that can print plastic objects, there is only a matter of designing the damn thing. So lets begin.
Design
I knew how to draw things with FreeCAD, but I am a software developer, so why not use OpenSCAD, I barley knew it at that time, so lets make it interesting and challenging.
First version
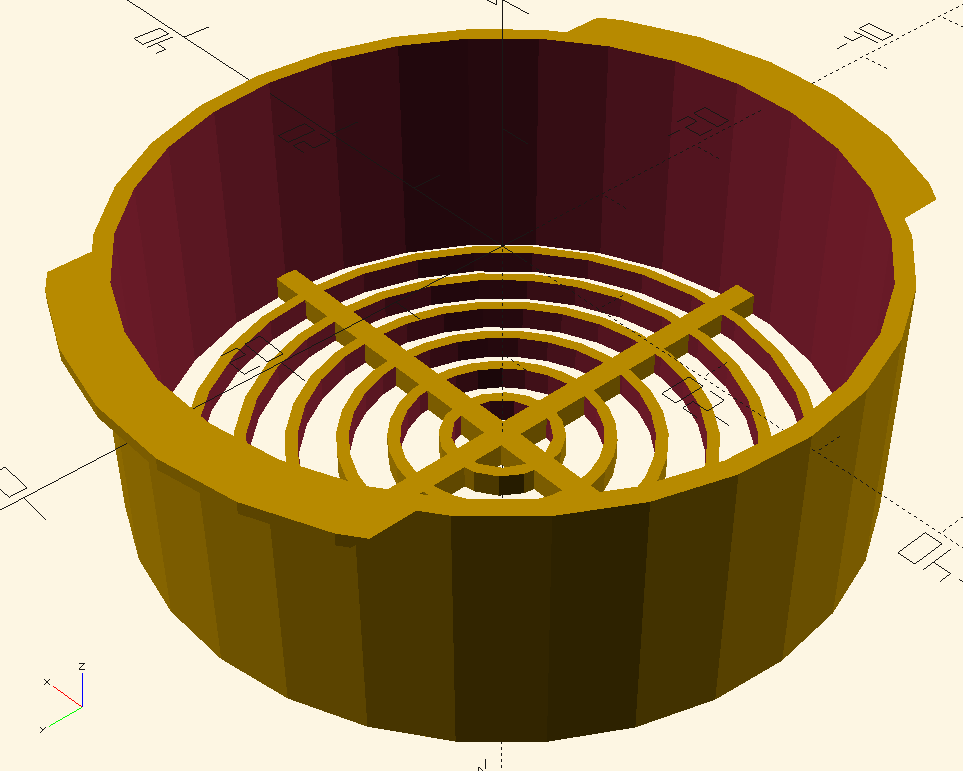
Well this felt like a success… I printed it and put it in the drain but it did not go as planed, the edges where too high and aluminium cover did not go down all the way and was “dancing” on the filter itself.

I must admit this was a crude design, but hey I am learning, so … next!
Next - second version
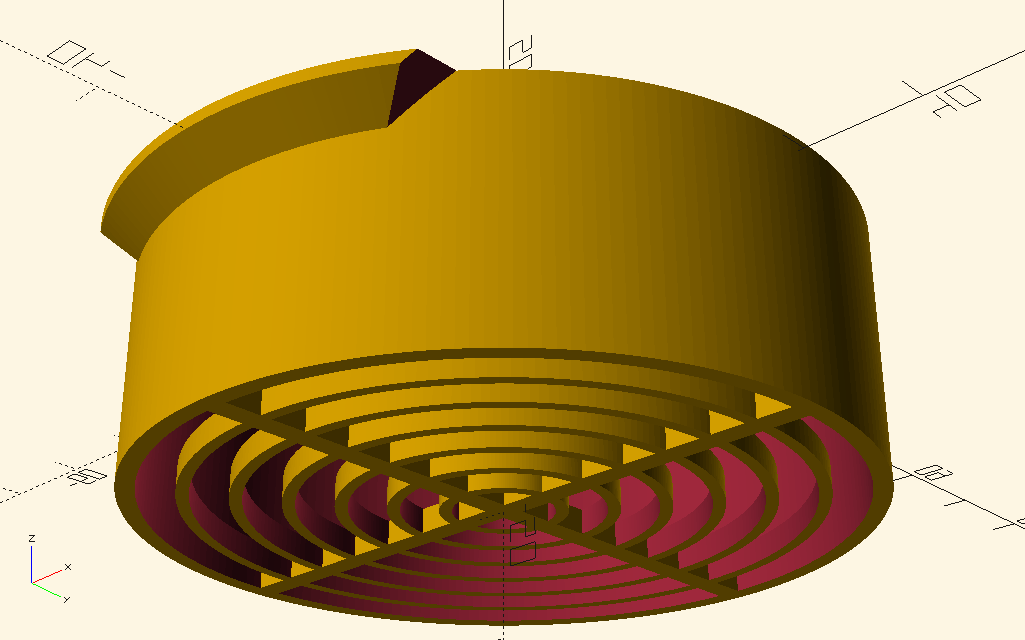
Next try had a small change with smaller edge at the top of the filter and a 45 degree angle of that edge as the picture shows.

The same problem, this was getting silly and not at all as the saying goes: measure twice and cut once - well.. replace “cut once” with “print once”.
Rethink the edge design - third and fourth version
To compensate for the edge of the cover I had to remove some of the edge of the drain filter.

And then smoothen all the cylinders in the model…

Success! The filter fits just right in the drain and the cover also.
Results
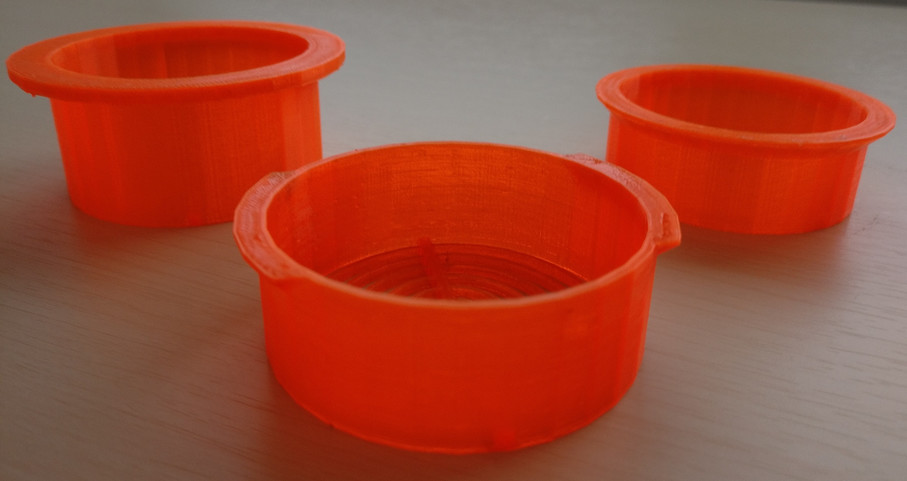
Lets see the printed filters
The first three versions, prototypes are in bright orange color, it seem appropriate at the time

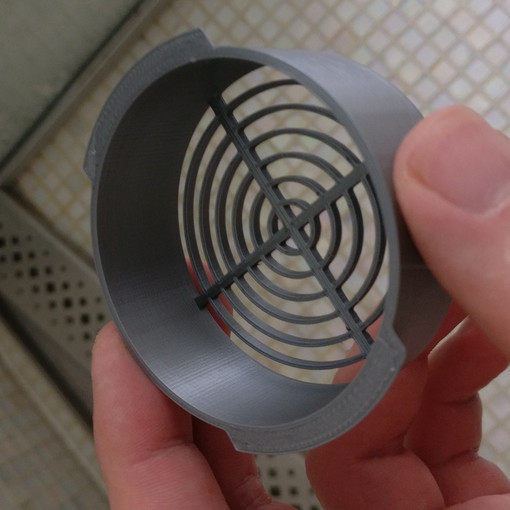
The final version in gray color, like the cover and surrounding material

And picture of installed filter in the drain

Conclusion
Drain filter is now in place for about 2 months now, I do not have any problems with clogging the pipe below anymore.
People always wonder what to do with a 3D printer if they got one, it was a no-brainier for me, this (Original Prusa i3 MK3) is my second printer and loving everything about it. You can make presents for people, you can make people laugh with silly things you can print and of course you can do useful and productive things that can help you in every day life.
Oh yea … there is one far more important aspect of owning a 3D printer than just enjoying its … fruits, so to speak; a challenge, to satisfy the need of being productive, you can learn so much more if doing something that you like.
The design files are published on Thingiverse (link in the links section) with public domain like licence, where anyone can customise it and look at the OpenSCAD file (code of the design).
This is it for now, so I wish you a happy day and do make people around you smile!


